Adding a new language to your website
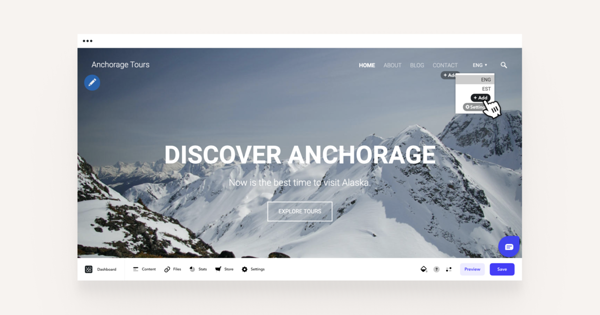
Click the Add button in the language menu.
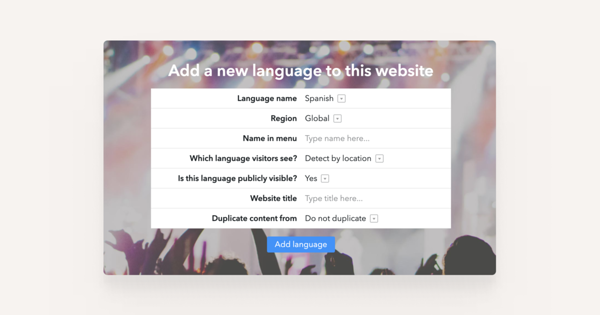
First, choose a preferred language from the Language name drop-down menu and then type in the name you'd like it to appear in the language menu to the Name in menu field.
If you'd like the web browser to detect the user language preference by location, choose to Detect by location from the Which language visitors see? field. Alternatively, you may also select this language as a default for all visitors.
The region will help you display the country's flag preference on your website. Important: the availability of the Region setting depends on which standard design you have chosen.
The second way to build a new version of your website in another language is by going to Content > Structure and choosing Add language at the menu's header.
Then, again choose a preferred language, give it a menu name, set the language detection on or off and lastly, add a website title in this new language.
How to reorder the languages in the language menu
Go to the Content > Structure view. Click the three-dot icon next to the New page button and select Reorder languages from the menu.
In the Reorder languages window, you can drag and drop the languages into your preferred order. When you’re done, click Done – the language menu on your website will be updated automatically.
Translating your pages into other languages
Translated pages are bound to each other. If a visitor changes the language of your website, then they are redirected to the translated version of the same page in the selected language.
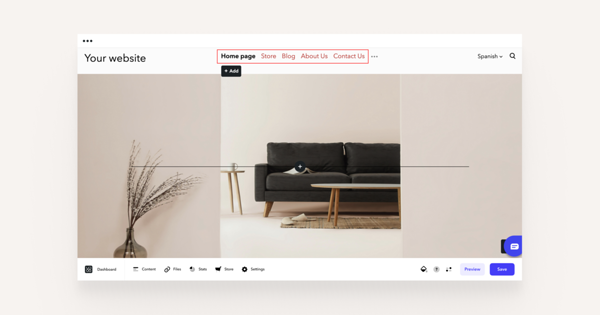
There are two ways to translate a page. All your untranslated pages are greyed out in your website's main menu.
Click the untranslated page name to open an Add a new page menu asking you to type in the page title. You can also change its address if necessary and pick the preferred layout.
The alternative way to translate a page into a new language is to go to Content > Structure. Choose the language you want to translate into from the upcoming menu.
Choose your preferred language from the top panel and expand the list to see all the pages on your new website. You'll see the Untranslated note next to each page that still needs to be translated.
Once you click on it, the Add a new page popup opens, where you'll have to give the page a title, manage its URL and select a layout.
Removing a language from your website
Before deleting a language, please note that removing a language will also delete all content added in that language. Always make sure your site has at least one language; otherwise, your site will become inaccessible to visitors.
To remove a language, open Content > Structure and click Language settings. In the window that opens, scroll to the lower-right corner and click the trash bin icon to delete the language.
If you have accidentally removed the only language from your website, contact our support team at support@voog.com, and we will help you recover your website.


